Products
Solutions
Resources
9977 N 90th Street, Suite 250 Scottsdale, AZ 85258 | 1-800-637-7496
© 2024 InEight, Inc. All Rights Reserved | Privacy Statement | Terms of Service | Cookie Policy | Do not sell/share my information

The InEight Completions product is highly customizable per your specific project requirements. Tab order and its functionality may differ than what is shown.
EXAMPLE: A field engineer is performing a weekly walk. He finds the relevant inspection, updates the information, assigns the responsible parties, and finally updates the inspection status.
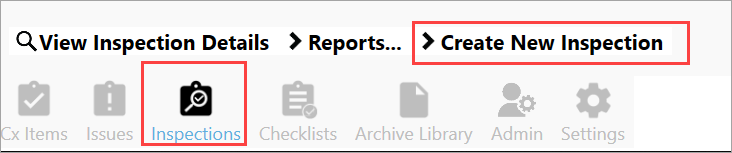
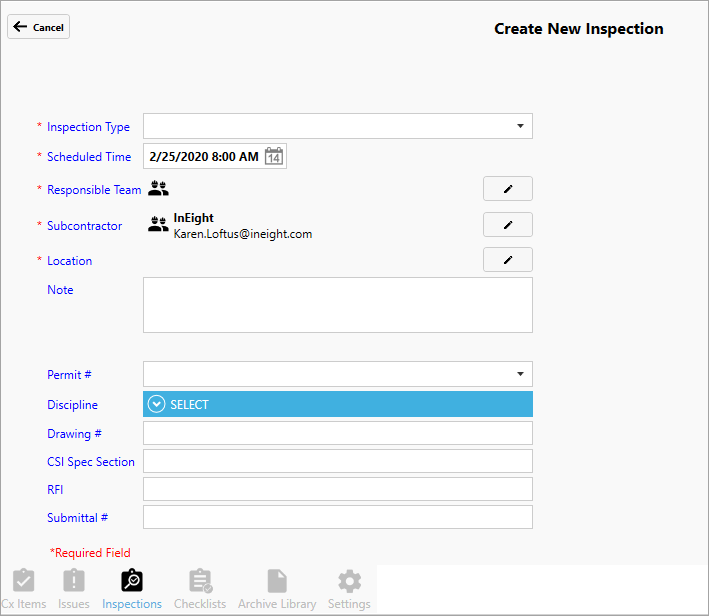
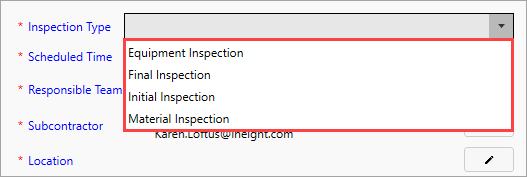
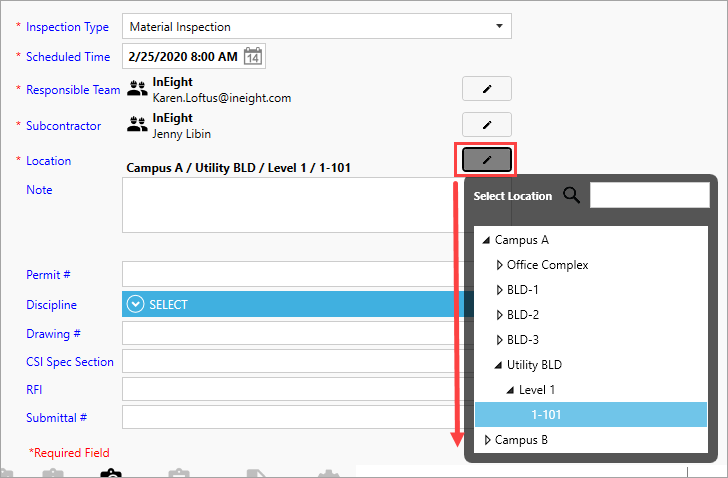
In order to create a Inspection, do the following:
With one or more inspections already planned and assigned, you might need to pull up an existing inspection.
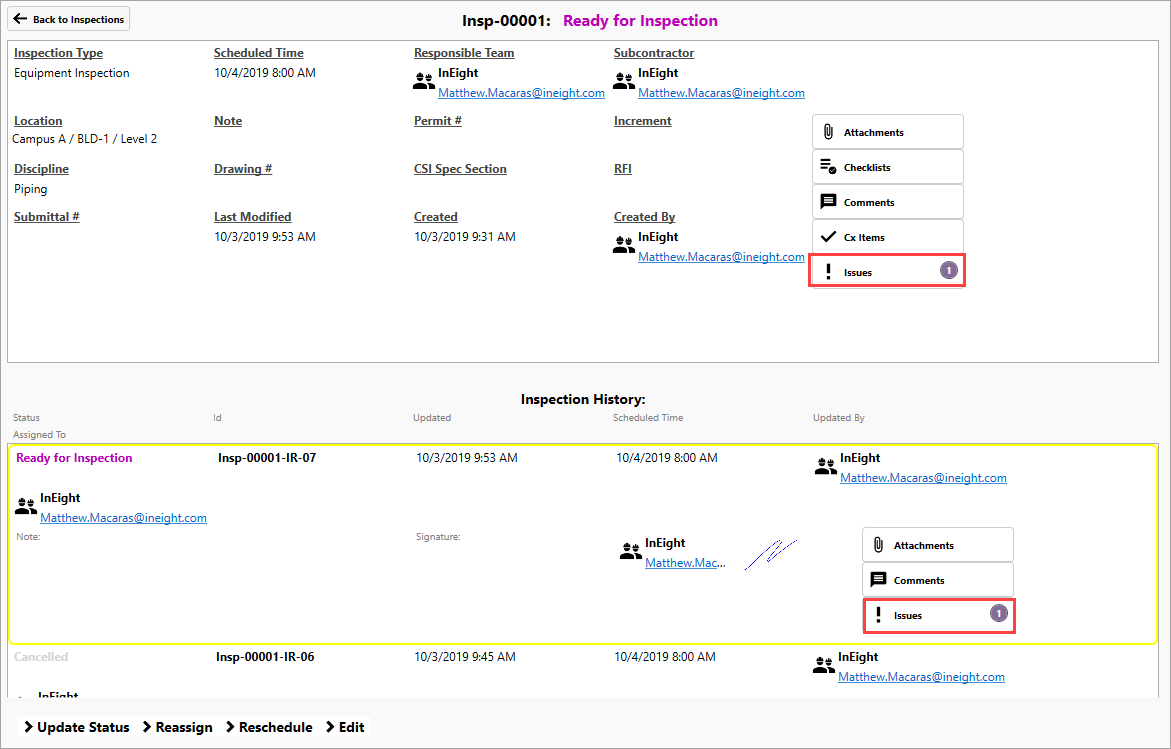
By double clicking on any singular Inspection tile, edits can be made via:
To learn more about attachments, see the Attachments lesson.

To learn more about checklists, see the Checklists lesson.

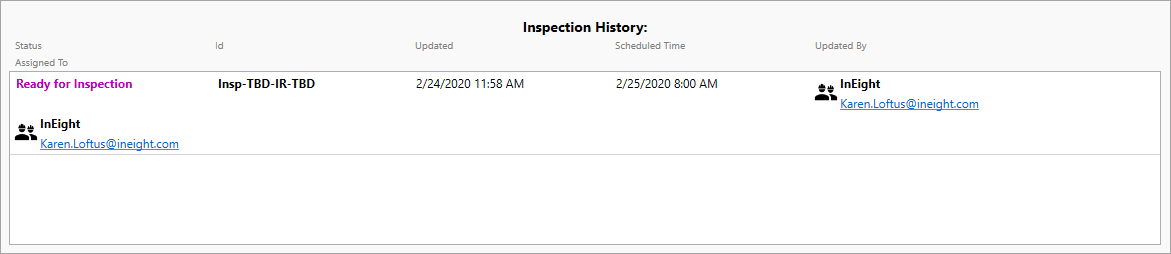
When added, comments are tied to a specific inspection, in this case "INSP-TBD-IR-TBD."

To learn more about Cx Items, see the Cx Items lesson.

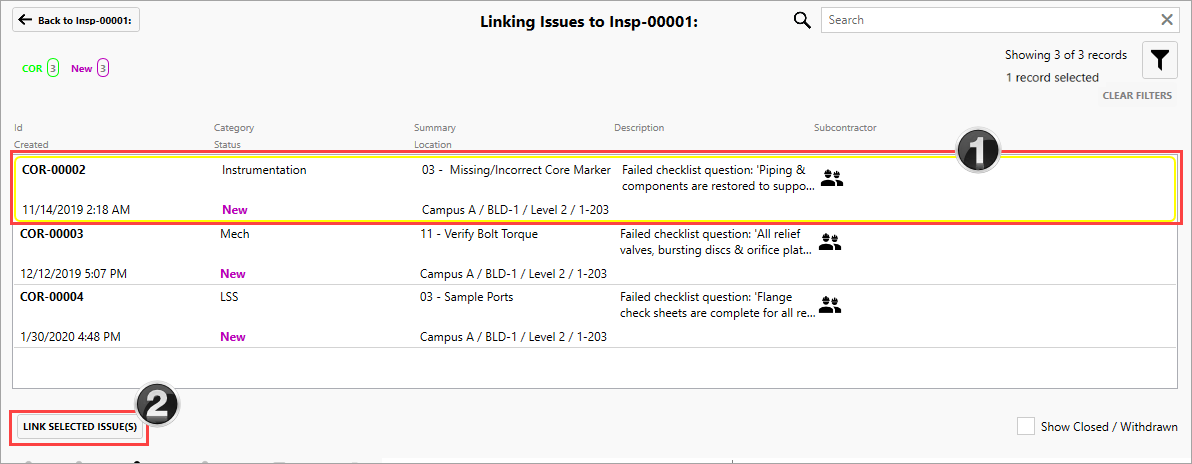
If the Issues button is selected, a new pop-up window appears where an Issue can be added, or links made to current, existing issues.
To learn more about issues, see the Issues lesson.

If the Link Existing Issues button is selected, a new pop-up appears identifying New Issues.

Additional Information
9977 N 90th Street, Suite 250 Scottsdale, AZ 85258 | 1-800-637-7496
© 2024 InEight, Inc. All Rights Reserved | Privacy Statement | Terms of Service | Cookie Policy | Do not sell/share my information